
John Betts - Fine Minerals > Home Page> Educational Articles > Labeling and Cataloguing Mineral Collections |
by John H. Betts, All Rights Reserved
As mineral collectors we are only the temporary caretakers of mineral specimens that have been around for a long time. Someday we will pass on our minerals to another collector. This may happen when we reach old age and can no longer store a large collection when we move to a retirement community, or it may be upon our death when our heirs disperse the collection. If you are lucky, you will have a family member that appreciates your mineral collection and will keep the collection in the family. They become the new owners.
We have a responsibility to pass on to the new owners the complete (known) information about each minerals specimen. Somehow you should convey at least the mineral species present and where the specimen originated. That is the minimum. Even better is to give how the specimen was acquired, from whom, when it was acquired, and any previous history about the specimen. It is also suggested to include a value for your best specimens to make sure they are not undervalued when your collection is dispersed.
There is no right way or wrong way to label and catalog a mineral collection. Today, we are fortunate that we have computers that make the job much easier. But even if you do not have a computer, you can still document each specimen in your collection.
First decide how to document the collection. The two most common ways are to (1.) have a small label with each specimen or (2.) place a number on the specimen that coincides with a separate catalog.
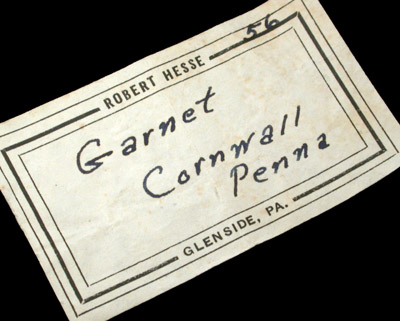
Having a small label with each specimen is the easiest way to start. Go through your drawers and boxes ensuring there is a slip of paper listing mineral species and location. If there is already a dealer's label, then do not worry about that specimen. But if you have minerals with no labels at all you should take the time to write down what you know. If you have time, write anything else you can remember about how you got the specimen while you are at it. Once there is a label with each specimen you can relax. If you are struck down tomorrow crossing the street, your mineral collection has the bare minimum of documentation for the next owner/caretaker.
Separate labels are a good start, but there are two problems: (1.) labels can get mixed up or separated from the mineral specimens and (2.) they do not look good in your display case of best minerals. (I prefer to only have my minerals visible in my display case and find labels unsightly.)
To keep the labels from becoming separated from the specimen you can glue a small label to the specimen enough the way George English and A. E. Foote did around the turn of the century. If you choose this method, make sure the ink and paper is waterproof so the specimen can be washed without losing the text. Another way is to glue a label to a base, then mount the specimen to the base using Mineral Tack or hot glue. If the minerals are stored in boxes, placing the label inside the box will keep the label with the specimen. (However, two years ago I purchased a mineral collection with labels stored in the boxes. But when the owner had moved houses the entire cabinet was tipped by the movers resulting in all of the specimens rolling out of the boxes. Complete chaos.)
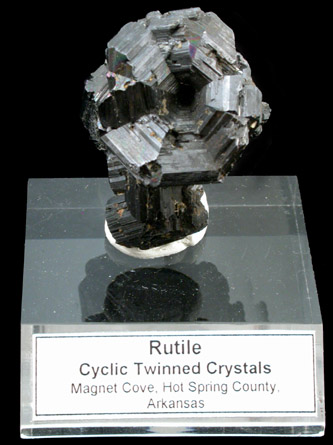
When it comes to the difficulty in displaying the minerals and labels in your display case, you may opt to create beautiful little display labels that are aesthetic and unobtrusive and will look good in your display case alongside your best minerals. But remember these too can get mixed up. Mounting the mineral on a base with a label attached is a good solution for this problem.
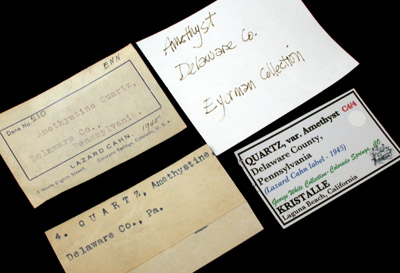
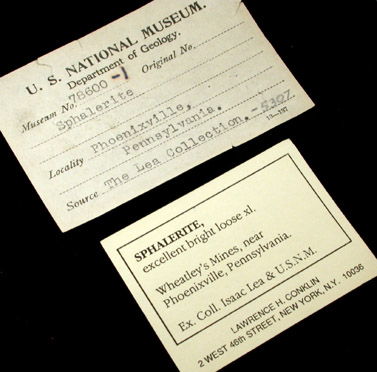
But what if you have historic labels too? Let's say you have several previous labels from previous owners of a specimen. It is essential that they should not be discarded especially if the previous owners were famous, such as Bement, Kunz, or from famous museum collections. But old labels really look unsightly in your display case. They are all different sizes, colors, and some are huge compared to the mineral. In this case you are forced to separate the labels from the specimen. You must now escalate to the second strategy for documenting a collection: placing a number on the specimen and store the information about the specimen, along with any historic labels, in another location.
The process is simple, place a number on the specimen, then create a catalog (using a computer and handwritten), and store the historic labels in an organized file system.
Placing a number on each specimen can be done many different ways. Some use White-Out or white paint to place a white dot in an unobtrusive location on the rear of the specimen, then write a number on the white dot with waterproof ink. Others print out numbers on label stock using a typewriter or computer (do not use an inkjet printer! The ink is water soluble.) If you use a paper label, use a white glue to adhere it. If you use self-adhesive labels make sure the adhesive is sticky enough to hold to the specimen. If it is not sticky enough, add some Mineral Tack to the back of the label and that will stick to almost anything.
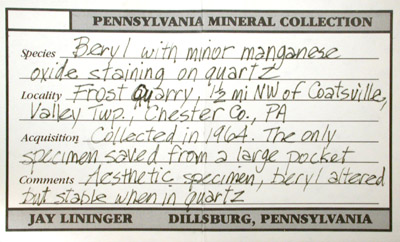
Once each specimen has a number, then create a catalog. The catalog could be a card file, a computer database, or just a handwritten list on lined paper. Whatever your method, record the mineral number along with mineral species and location of origin. As before, add any other known information (or leave room to add it later) such as the history of the specimen, price, dates, etc. Using a computer database is very easy. Any program will work: Excel, Access, Paradox, dBase, FileMaker, etc. You can create a field for each type of information. In my database, I record mineral species, locality, city, state, country, how and when it was acquired, price, size, weight, whether I have photographed it. Sample databases, formatted with various information fees can be found at www.johnbetts-fineminerals.com in the Educational Article section.
Once you have created a catalog, you should store it in a safe place and make copies. Store a copy near the minerals so it can be easily referenced. If you used a computer database to catalog the collection, you can format the data in lots of different ways and have lists, card files, etc. stored with the minerals. The idea is to have some form of the catalog easily found with the minerals. (I have purchased several collections that were cataloged, but the catalog was never located and probably discarded with the previous owner's papers when they were cleaning out the house.)
Congratulations! Now each mineral is numbered and cataloged. All that is left is a system for storing historic labels for your display minerals. Mineral specimens that are not on display, say in drawers or in mineral flats, can have the historic labels stored in the boxes with the minerals. It is suggested to write (in pencil) the mineral specimen number on the historic label just in case the labels get mixed up.
For your display minerals you need to store the historic labels separately, out of sight. One method is to buy clear sleeves at the stationery store that fit a three-ring binder. They have sleeves for storing business cards that are a good size for storing most mineral labels. Place the labels in the sleeves (numbered to correspond to the mineral specimens) and clearly label the binder and store it near your display collection. Other collectors prefer using small envelopes stored in a card-file box. Each envelope is numbered with the mineral specimen number and the labels are placed inside. Again the key is to store the labels near the minerals so that in the future they can be paired up again with the specimen.
Above is a simplified description of cataloging a mineral collection. There are other, more elaborate methods. Many things are possible if you use a computer. An image of each specimen can be embedded in a database. One advantage of purchasing minerals through the Internet is that you can save images and descriptions directly from the seller's web page and use it as your catalog. But you should only attempt these techniques if you are comfortable with using database software as the added complication can become intimidating.
It sounds like a lot of work. Start with small portions and to start early. If you start when your collection is only 100 specimens it will be less intimidating than if you have 4000 specimens to be cataloged. The key to success is keeping the process from being burdensome. Then stick with it.
When Joe Cilen (1916-1997) died he left a house filled to the brim with almost 25,000 mineral specimens. His collection was exemplary of how to organize and catalog a collection. Every mineral had a number attached to the bottom. A label with corresponding number was stored with the specimen. The original dealer's label, if there was one, was stored with the specimen. Especially the old A.E. Foote, Hugh Ford, Lazard Cahn, John Albanese, Enrst Wiedhaas, and other famous old dealers and collectors. Then there were two separate card files cross referencing the number by species and location, just in case the labels were lost. I have seen many old collections and have never seen one so organized as Joe's. And Joe did it all before computers.
Download Sample Mineral Catalog Databases in the following formats
Please support our sponsor
© John H. Betts - All Rights Reserved